The previous article introduced OpenGL in Android, including coordinate mapping, etc. In the OpenGL ES environment, the displayed drawing objects are closer to what the eye sees through projection and camera views. This presentation is achieved by mathematically transforming the coordinates of the drawing objects. Here, let's introduce some knowledge about projection and camera views. The code examples in this article can refer to the previous article:
The main content is as follows:
- Projection types
- Defining projections
- Defining camera views
- Applying projections and camera views
- Running effects
Projection Types#
There are two main projection modes in OpenGL, namely orthographic projection and perspective projection. Their characteristics are as follows:
- Perspective projection: It conforms to the human eye's habits and presents the effect of near objects appearing larger and far objects appearing smaller.
- Orthographic projection: All objects maintain their original size on the projection plane.
The viewing volume of perspective projection is a frustum, while the viewing volume of orthographic projection is a cuboid. The diagrams below illustrate perspective projection and orthographic projection:
The corresponding matrix calculation functions for perspective projection and orthographic projection are as follows:
// Perspective projection matrix
Matrix.frustumM(float[] m, int offset, float left, float right, float bottom, float top, float near, float far);
// Orthographic projection matrix
Matrix.orthoM(float[] m, int offset, float left, float right, float bottom, float top, float near, float far);
In the above functions, the parameter m is used to store the corresponding projection matrix data, and near and far represent the near plane and far screen distance of the viewing volume, while left, right, top, and bottom correspond to the parameters of the far plane.
Defining Projections#
Based on the content of the previous section, here we use perspective projection and fill the projection matrix using Matrix.frustumM(), as shown below:
private val projectionMatrix = FloatArray(16)
override fun onSurfaceChanged(unused: GL10, width: Int, height: Int) {
    GLES20.glViewport(0, 0, width, height)
    val ratio: Float = width.toFloat() / height.toFloat()
    Matrix.frustumM(projectionMatrix, 0, -ratio, ratio, -1f, 1f, 3f, 7f)
}
The above code fills a projection matrix projectionMatrix, and its changes are shown in the following animation:
Defining Camera Views#
As the name suggests, the camera view is like observing an object from the perspective of a camera. We use the Matrix.setLookAtM method to fill the view matrix. The key parameters are the camera position, target position, and the vector pointing upwards from the camera. Then, the projection matrix and view matrix are combined into vPMatrix, as shown below:
override fun onDrawFrame(gl: GL10?) {
    // Draw the current frame for rendering specific content
    Log.d(tag, "onDrawFrame")

    // Set the camera position (view matrix)
    Matrix.setLookAtM(viewMatrix,0,
                  0.0f,0.0f,5.0f, // Camera position
                  0.0f,0.0f,0.0f, // Target position
                  0.0f,1.0f,0.0f) // Upward direction vector of the camera
    // Calculate the projection and view transformation
    Matrix.multiplyMM(vPMatrix,0,projectionMatrix,0,viewMatrix,0)

    // Specific drawing
    triangle.draw(vPMatrix)
}
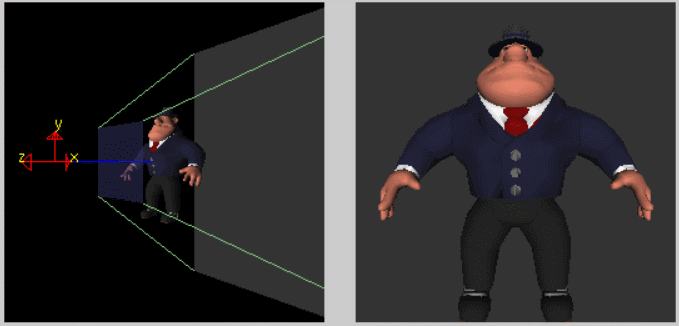
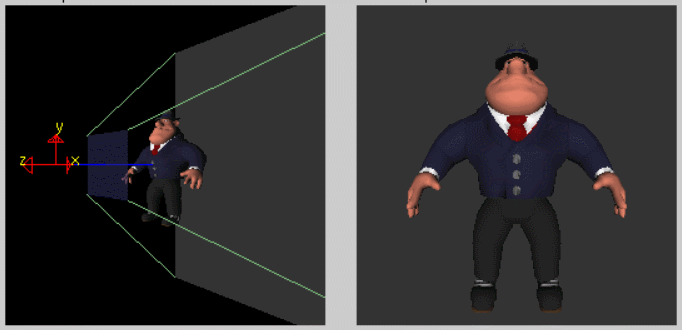
In the above example, the z-coordinate of the camera position can only be between near and far, which means it must be between 3 and 7 and cannot be observed outside this range. The animation below illustrates this:
Applying Projections and Camera Views#
To adapt to the projection and view transformations, modify the shader code in the previous article as follows:
// Default
attribute vec4 vPosition;
void main() {
    gl_Position = vPosition;
}
// Applying projection and view transformations
uniform mat4 uMVPMatrix;
attribute vec4 vPosition;
void main() {
    gl_Position = uMVPMatrix * vPosition;
}
Simply pass the vPMatrix matrix calculated in the previous section into the shader:
fun draw(mvpMatrix: FloatArray) {
    // Get the address index of the attribute variable
    // Get handle to vertex shader's vPosition member
    positionHandle = GLES20.glGetAttribLocation(programHandle, "vPosition").also {
        // Enable vertex attribute, it is disabled by default
        GLES20.glEnableVertexAttribArray(it)
        GLES20.glVertexAttribPointer(
            it,
            COORDINATE_PER_VERTEX,
            GLES20.GL_FLOAT,
            false,
            vertexStride,
            vertexBuffer
        )
    }
    // Get handle to fragment shader's vColor member
    colorHandler = GLES20.glGetUniformLocation(programHandle, "vColor").also {
        GLES20.glUniform4fv(it, 1, color, 0)
    }

    // Get handle to shape's transformation matrix
    vPMatrixHandle = GLES20.glGetUniformLocation(programHandle, "uMVPMatrix")
    // Pass the projection and view transformation to the shader
    GLES20.glUniformMatrix4fv(vPMatrixHandle, 1, false, mvpMatrix, 0)

    // Draw the triangle
    GLES20.glDrawArrays(GLES20.GL_TRIANGLES, 0, vertexCount)
    GLES20.glDisableVertexAttribArray(positionHandle)
}
By applying the projection and view transformations in the code, the deformation problem caused by switching between landscape and portrait orientations is solved. This kind of deformation can naturally be extended to other areas, such as the aspect ratio of video rendering in OpenGL.
Running Effects#
You can compare the running effects with the ones in the previous article. The running effect is as follows:
You can reply with the keyword "OpenGL" to get the source code. To obtain the program shown in the animations in the text, reply with the keyword "OTUTORS".